sábado, 10 de noviembre de 2018

NAVIDAD | Centro de mesa CHRISTMAS | Centerpiece

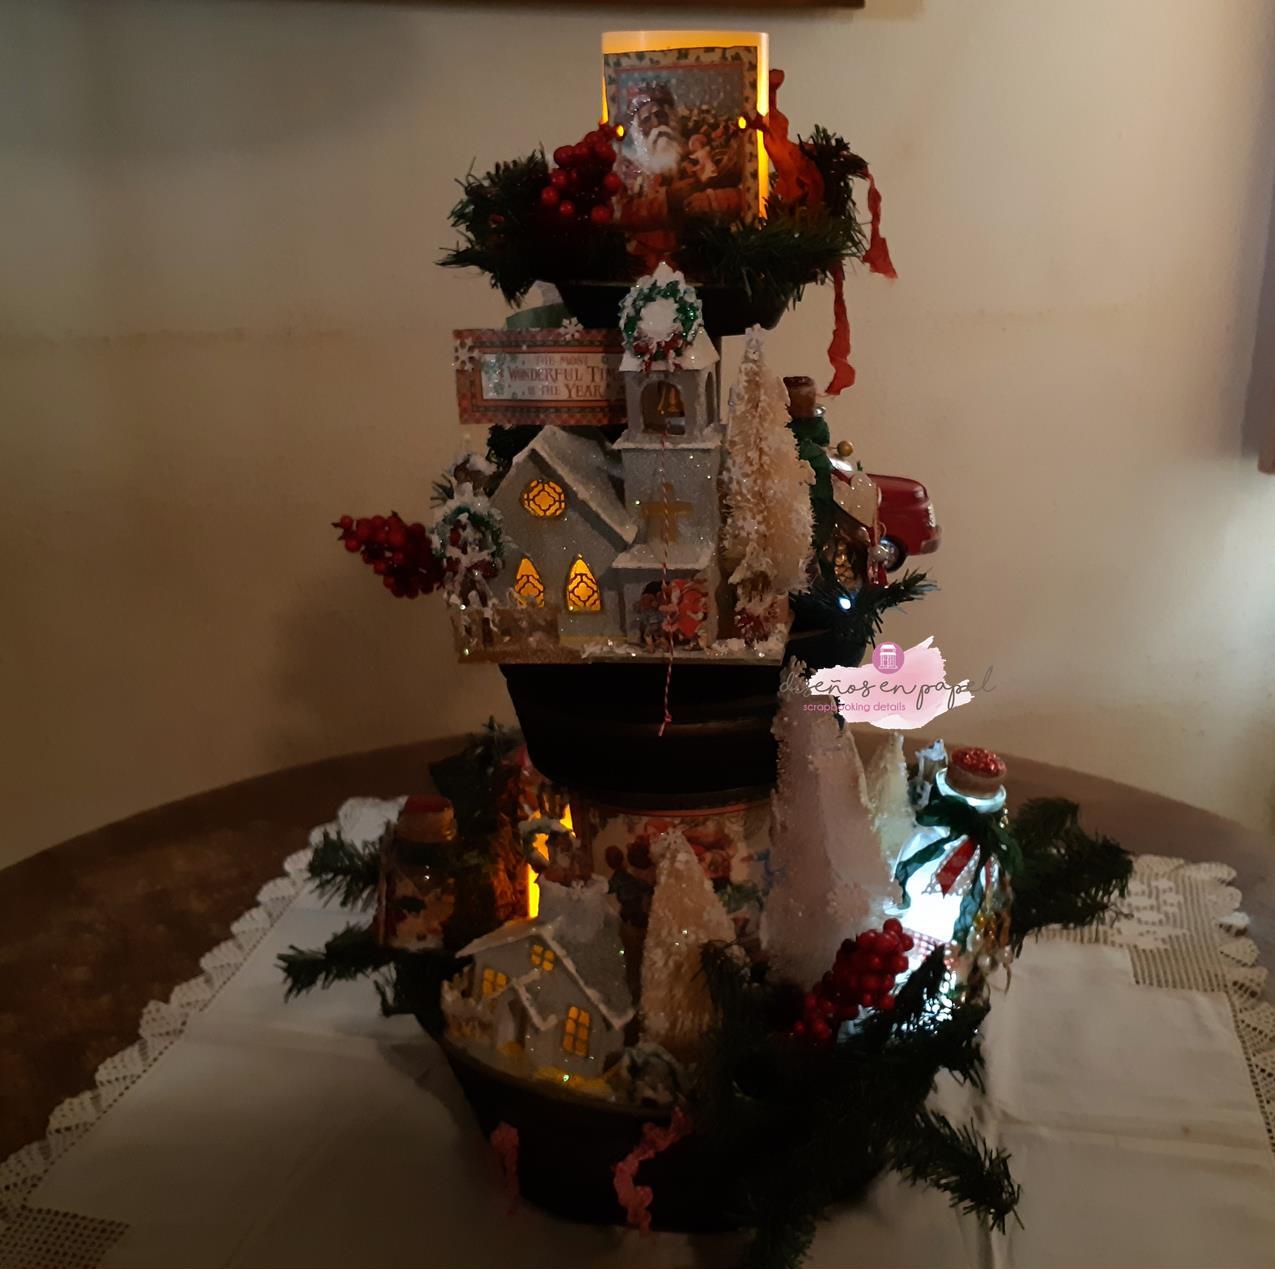
Hola! ahora les quiero compartir éste centro de mesa que es la suma de varios proyectos que les mostré anteriormente, espero que les guste! Yo estoy más que encantada con el resultado y esperando con ansias el momento de iniciar las decoraciones en casa para dejarlo en su sitio :)

Hello!!! Now I want to share this centerpiece which is the result from several projects I showed you before, hope you like it! I'm more than pleased with it! and waiting the  moment to decorate my table with this :)

Como pueden ver, el post anterior a éste es el tutorial del stand y para ésto lo hice :)

As you can see, the previous post to this is this stand tutorial made for this :) 


Aquí pueden ver las villas de Navidad ;)

Here are also, the Christmas villages ;)


También agregué algo de follaje de pino, artificial, así como bayas para dar el color rojo que tanto me gusta en Navidad 

Also added some greenery and some berries, all artificial, because I LOVE the red in Christmas.


En una taza navideña puse bastones de dulce de menta para que quien pase tome uno ;)

In a christmas cup are some candy cane, so everybody can take one ;)


Como pueden ver, también están las botellas alteradas y me encanta cómo lucen en el arreglo!

As you can see, the altered christmas bottles are also here and I LOVE how they are part of this centerpiece!


Puse algunas tarjetas de la colección de Graphic 45 para completar los espacios aún más ;)

I used some ephemera cards from Graphic 45 to fill all spaces and make them look more festive ;)


Este Santa dará la bienvenida, lo sujeté con unos eyelets y seam binding pintado en rojo.

This Santa will welcome everybody, is hold with some eyelets and painted seam binding.


Espero que les guste e inspire!!! Les dejo el link del video...

Hope you like it and get inspired!!  here's the video link....


Porta cupcakes DIY

Hola!!! Aquí les comparto cómo hice éste portacupcakes que usaré para centro de mesa en Navidad.

Hello!! I want to share with you how I made this cupcakes stand, which I'm planning to use as a centerpiece in Christmas.

Primero, conseguí tres piezas de metal como éstas en diferentes tamaños, para hacer la torre.

First I found this metal pots like this in different sizes to make the tower.


Las cubrí por todos lados con gesso, es importante no brincar éste paso para que la pintura dure y no se desprenda del metal.

I covered all of them with gesso; this step is so important because when you paint, after this step, with will lasts.


Cuando está cubierto con gesso, dejar secar por completo
.
When is all covered with gesso, lets dry completely.


Después aplicar pintura acrílica. Yo quería el mío negro.

After that, apply acrylic paint. I choosed black color for mine. 


Cuando la pintura está seca, con éste mousse de nuvo le dí un distress y lo pasé por algunos relieves.

When the paint is dry, I distress the pots with this nuvo mousse.


Aquí ven cómo queda al final.

Here you can see how looks all distressed.


Ahora la parte que me costó trabajo!! CONECTARLOS! probé varias cosas y la que funcionó fué ésta: me fuí a Home deppot y compró dos varas de madera como las ven en la foto, pedí que me las cortaran a 8" y las cubrí con esta tinta en color café.

Now the most difficult part, CONNECT THEM!! I tried several things and the one it worked was this: I went to home deppot and bought 2 wooden sticks, as they are in the pic, I ask them to cut in 8" pieces. At home covered them with this brown ink.


Como los palos eran muy angostos uní tres piecas con cordón, posteriormente se lo quite, solo era para balancearlos. y los pegué con éste pegamento epóxico, siguiendo perfectamente las instrucciones del fabricante, Y FUNCIONO!!! yeiiiiii.

As the wooden sticks were very narrow, I joined 3 pieces with a cord, later I took it off, it was only to balance them, and I glued them with this epoxy glue, perfectly following the manufacturer's instructions, AND IT WORK!!! yeiiiiii. 


Y en esto lo transformé!!! Mi hermoso centro de mesa para Navidad. Espero les haya gustado e inspire. :)

And this is what I made with it!! My beautiful centerpiece for Christmas. Hope you like it and get inspired. :)


INSPIRATION | Christmas villages | Scrapbook | DIY

Hello everyone!!! I made my tiny Christmas villages!! I want to share some pics with you. Unfortunatelly I don't have a tutorial for this, I'm sorry but I hope you can find inspiration with mines and make yours ;)

I was looking in pinterest some templates, but I found they don't match all sizes between them, so I looked for some cereal boxes and make them :) 


That´s the reason I didn't recordered, I was improveing. Fortunatelly I love the result, and now I say my self I should made a tutorial :/  

The chappel as well as the housed I painted them with acrylic's and then covered with some layers of glitter and gesso to make them look snowy


I used Graphic 45 images to decorate because I really love the vintage and warm look of them!!


They have inside a tea light and looks amaizing at night!!


I can't wait to show you where I'm planning to put them :)


Here's a video tour, hope you watch it and get inspired :)


Thank you so much for coming!!!